Picture Display Movement. Step 3. Organize

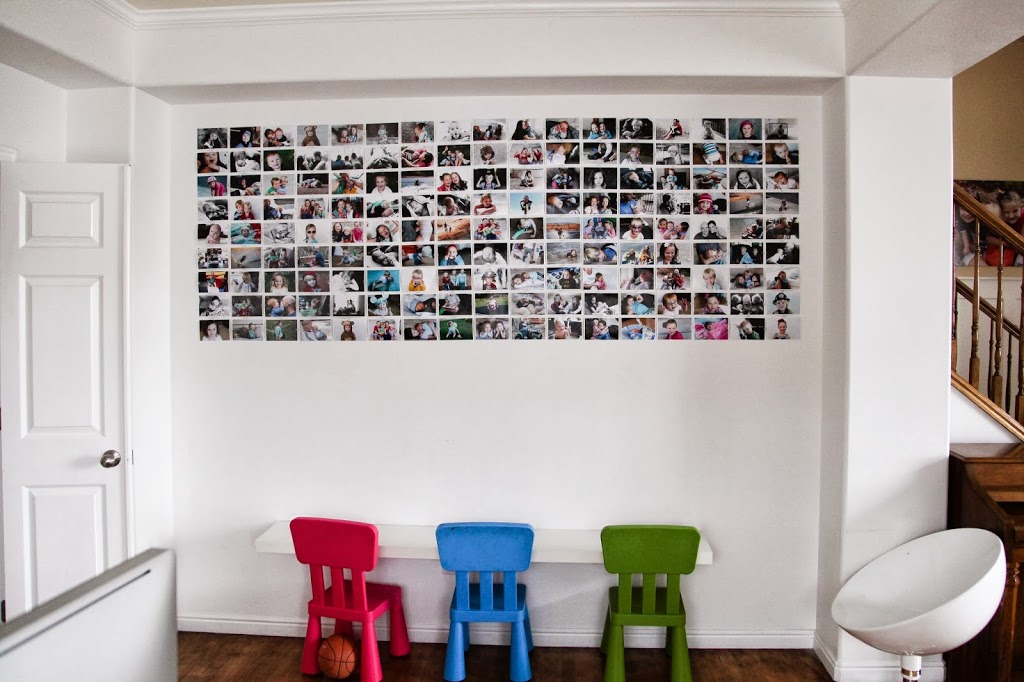
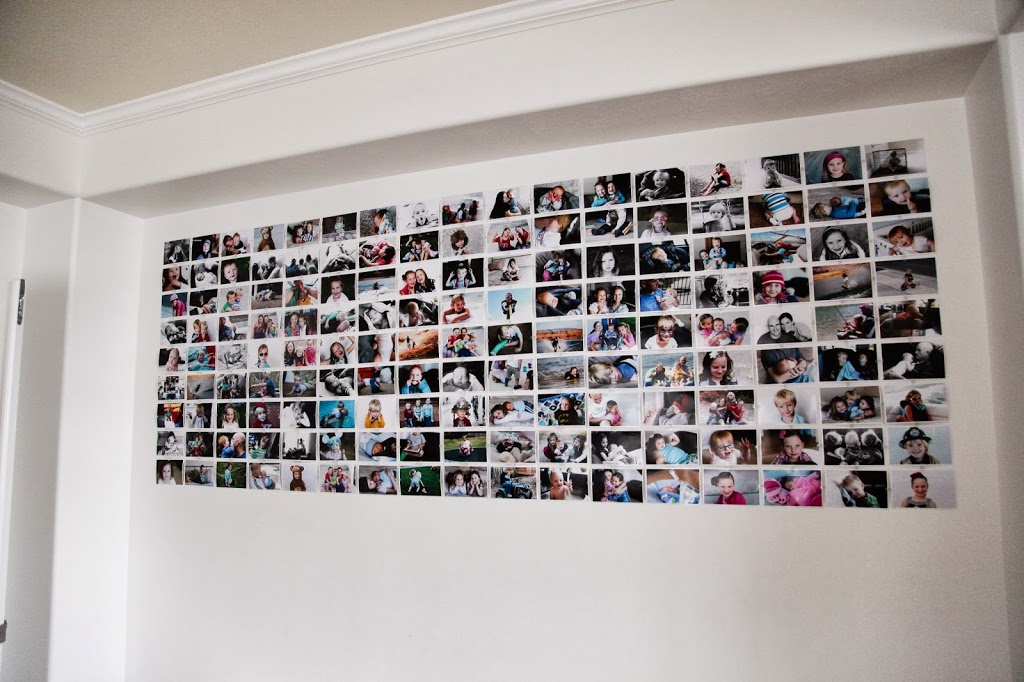
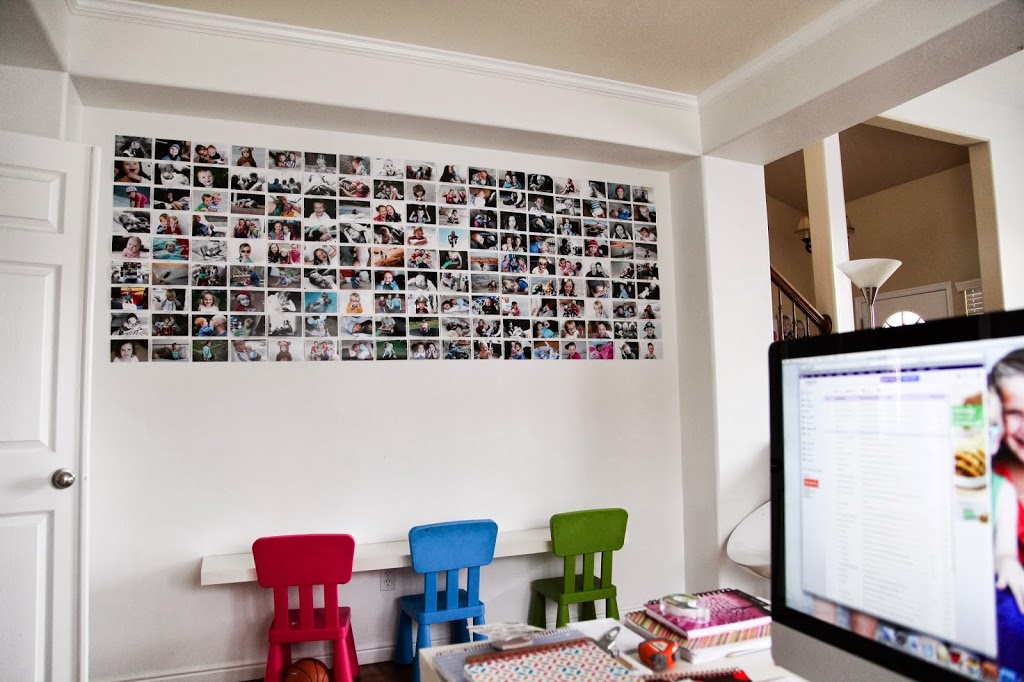
{For Step 2 in the Picture Display Movement, click here}

ORGANIZE YOUR PHOTOS:

For me, this step initially felt the most overwhelming.  But once I got started, it turned out to be no big deal and went really fast.

Digitalphotos2

I use iphoto for all my photo organizing.  BUT.  You don’t have to have iphoto to organize photos like this.  You can use the same “folder” system on any computer, Mac or PC.

The problem for me initially was the lack of organization within iPhoto and being able to effectively choose what I wanted to print and keep some sense of order in doing that.


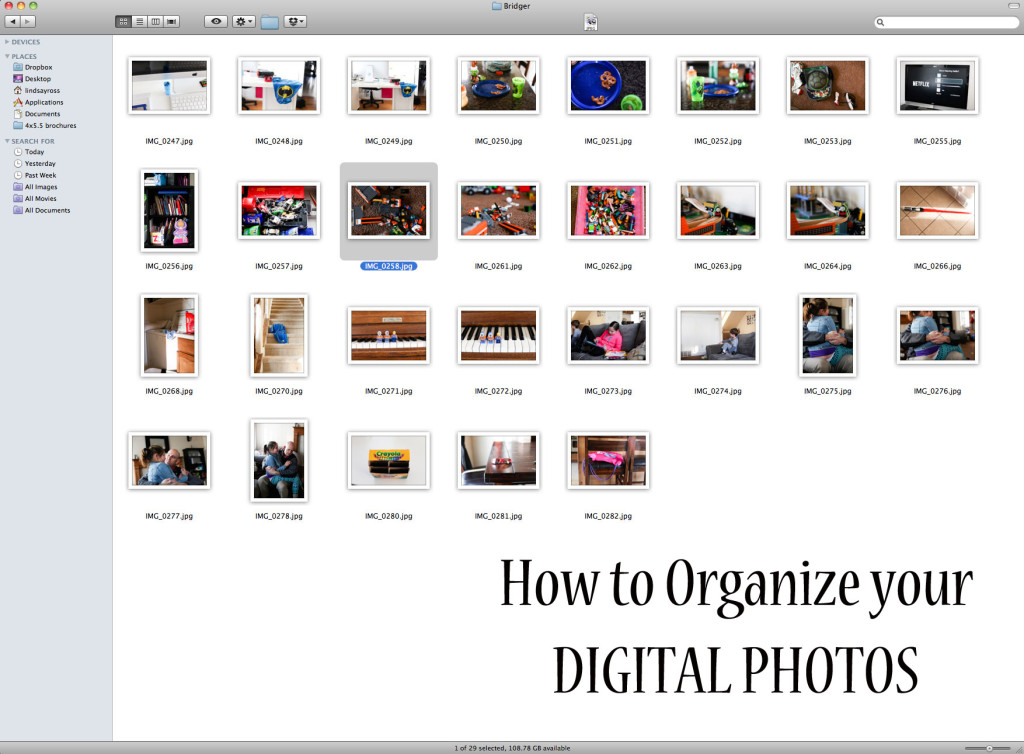
All my pictures were in iPhoto, but that’s it.  If you don’t use iPhoto, your pictures are all sitting somewhere on your computer waiting to be organized (probably in a native “Pictures” folder).  I started using iPhoto in 2009 so I had 5 years worth of photos in there and was overwhelmed by the prospect of organizing them.

Until I came up with this system.


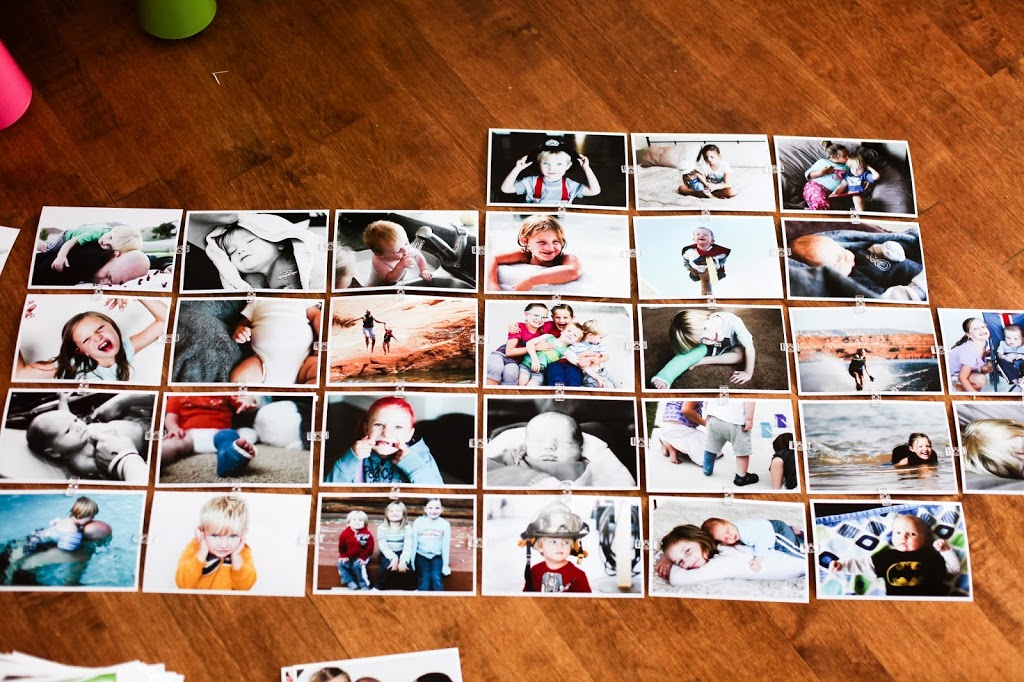
Keep in mind there are hundreds of different ways you can organize photos.  Which is what overwhelms me. So I had to pick something simple. That I know I would do and that I would maintain.


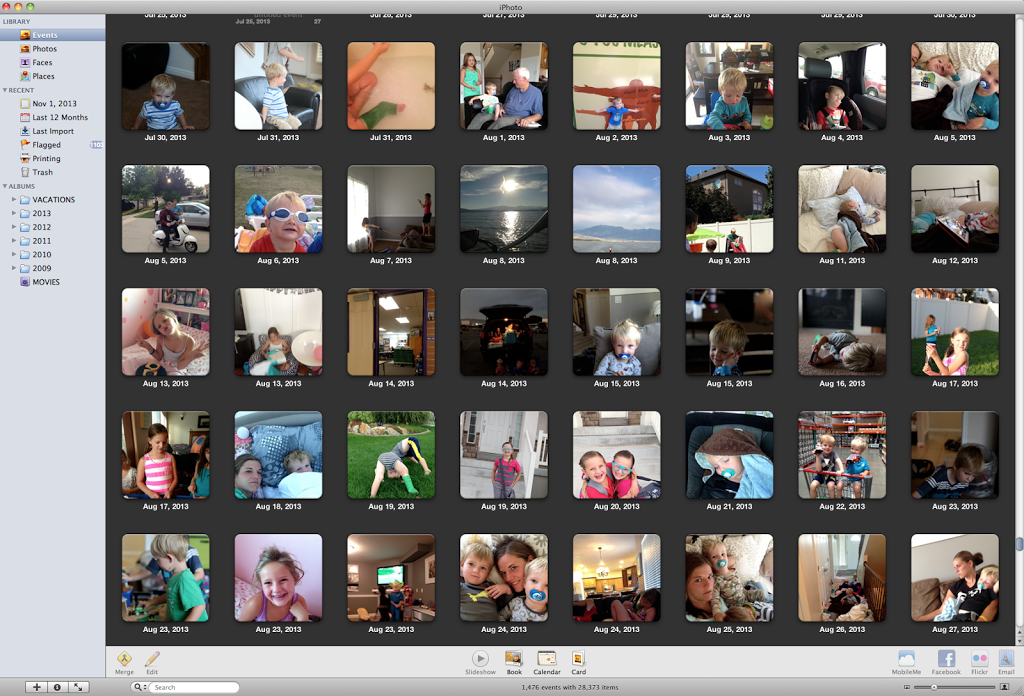
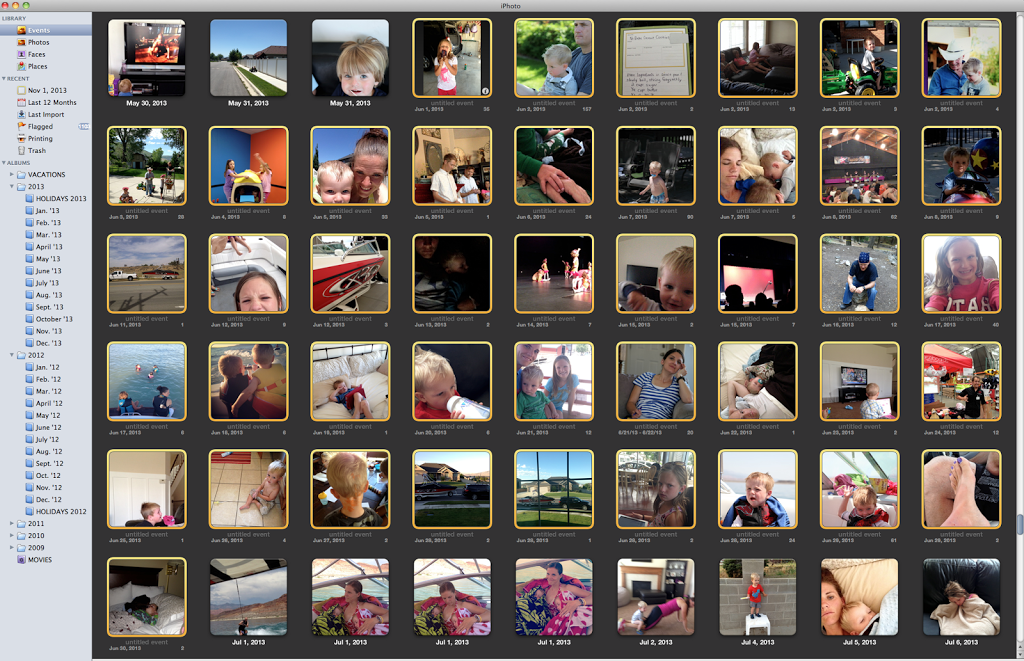
To organize the photos that were already in iPhoto, 5 years worth,  I created folders for each year as well as a “vacations” folder.  See the photo below, under “albums” where it has folders for each year and one for vacations.  If you aren’t using iPhoto, just create these folders right on your desktop or in your “Pictures” folder.

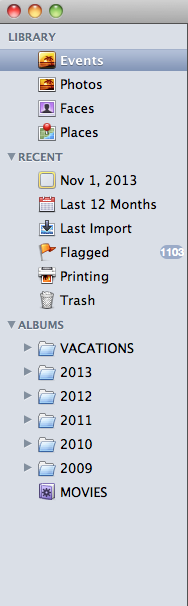
I then created an album for each month in that year as well as an album for Holidays in that year.  Then I moved those albums into the folder for that year.  If you aren’t using iPhoto, just create another folder for EACH month and put those months in the individual years folder (so each year will have 12 folders–one for each month).

Then I clicked on “Events” in my library so all the pictures in my iPhoto library would come up and went month by month and put the pictures in their corresponding folder.  The physical pictures don’t move so they are all still visible in the events part of your library.  But then when you click on one of the months folder, only that month shows (which can make it easier to find certain photos).  If you aren’t using iPhoto, you can sort the photos on your computer according to the “date created” and then drag and drop the pictures into the correct months.
To do this quickly in iPhoto, you can click on the box with pictures from the first of the month, then hold down the shift key and click on the box with pictures from the last of the month.  Then just drag and drop them into the appropriate album.  You can also drag and drop if you aren’t using iPhoto.  Just look at the date on each photo and drag them into the appropriate folder.
{See how the boxes for July are highlighted in yellow.  Then just drag those into the “July” album.}
After each month, I would look through that month for any holidays or vacations, highlight those pictures and drag those into the appropriate albums as well.  You can have the same picture in multiple albums without moving the original file.  It just makes a “copy” of those pictures which takes up very  minimal space on your hard drive.
This entire process of organizing 5 years worth of photos (I have about 30,000 photos in my iPhoto library) took me about one hour.  Quick.  Easy.  And simple.
And I feel So. Much.Better now that it’s done.
When I first tried organizing my photos I was doing it by events and dates and each individual kid and it was taking forever.  I chose the month-by-month system because I have a general idea when we did certain things so when I’m trying to find a photo, any photo, I just search in the month folder it would have taken place and there it is.
Now to maintain.  At the end of each month (on a SET date) I will move those files into their album for the month and put them in the folder for their year.  Should take about 2 minutes.
If you don’t have iPhoto, figure out a photo organizing system that works for your family.  Just keep it simple and schedule regular times to maintain it.  If you have the right system, it really doesn’t take very long.
You can still set up a Folder for each year, then folders for each month and drag the photos into those folders. This works on a PC or a MAC.
Step 3.  Organize those photos
Now don’t stop there!  Step 4 is to PRINT THOSE PICTURES!!!!
If you have questions, please feel free to contact me!  I’m happy to help where I can.
And.  I’d love if you joined the blog community!  Right now, you’ll get my TEN PHONE PHOTOGRAPHY TIPS that will immediately improve the photos you take with your phone.  It’s free!  And you’ll also get periodic blog news, tips and tricks, and exclusive blog members only info.  Just enter your name and e-mail below!  (You’ll get a separate e-mail asking you to confirm your e-mail.  Shortly after you’ll get your ten free tips!)

Where should I print my pictures?

I get asked this question alot.

My answer: It depends on what you’re using the pictures for.

I know most professional photographers will say to only get your photos printed at a professional lab. The only time I disagree with this, is based on your answer to the question, “What are you using the pictures for?”

If I am printing pictures 5×7 or smaller and they are intended for an album, like Project Life, I print my photos at Costco.

I did a test print of several different photos at four different printing labs: Costco, Walmart, Walgreens, and a professional lab. The photos at Walgreens turned out a little green because I forgot to uncheck the “auto-correct” button on their site (I always recommend turning OFF the auto-correct). The quality of the 4 different places was comparable but the coloring and “brightness” of each photo varied a bit. The key is to do a test print first and make sure you like the “look” of the printers there. It’s hard to see a comparison accurately over a computer screen since all monitors show colors differently. But this gives you an idea of how the photos can look a little different from place to place. Some people who are looking to decorate their homes might look into getting printed wall art to had that extra bit of art to their walls. If you are interested in finding out more about about getting your photo printed on acrylic to add your wall art, there are some companies out there that could help you to achieve this method.
2015-01-29_002
Keep in mind when printing anywhere, what you see on your screen isn’t necessarily what you get from the printer (unless your monitor is calibrated to that specific printer). I have learned that Costco prints tend to be a little “dark”. So before I send them to Costco I lighten them up a little (bump up the exposure) through some editing software. All of the photos in this wall collage I did are from Costco.

OR I print my 4×6 photos at York Photo online. If you google “free 4×6 prints” a code for 100 free prints to york photo should pop up. You can use that the first time you order prints from them. They also have sales on their prints all the time so I have a folder on my desktop with pictures I want to print and I wait until there is a sale and then send a batch of those pictures in to be printed.

If I am printing bigger than 5×7 or printing anything large that will be hung on my walls, I use Pixels Foto and Frame (for the Utah readers, it’s on 90th S. and State Street in Sandy) or Persnickety Prints (in Orem, Utah)–Persnickety also ships for a flat rate and their customer service is unbeatable. Online I use Persnickety Prints or Mpix. These are all professional printing labs with affordable prices.

I use Persnickety for regular prints (they’ll do custom sizes which I love to do) and I also use them for matboard prints like this one:

Mpix has a bunch of novelty photo items like calendars and photo books and cards along with regular prints. I also use them for printing stickers and business cards.


Any photos I print I use a matte or lustre finish instead of glossy. Makes them look better in my opinion.


If you have never printed somewhere before and don’t know what the prints will end up looking like, just send a few photos to be printed. Then if you like how they look, you can send a bigger batch for prints.


I have been using Persnickety Prints the most lately. They do printing for Instagram pics (square photos) as well as Project Life album sizes (3×4’s). I also love their polaroid type prints and various sizes of square prints. They specialize in 12×12 prints (that work great with the Project Life app) and they make 5×5 mini photo books that work perfect with Instagram prints or as a custom book.


For some ideas on an incredibly easy way to document your family story, check out the Project Life App. It’s “scrapbook” cheating in the palm of your hand.

2014-10-18_0012

And for ideas on how to display photos in your home, you can check out several ideas of Wall Displays using photos here. And for even more, you can follow my Pinterest board “Photo display ideas”.

Picture Display Movement. Step 2. Load and Back up.

{Click here for Step 1 of Project Picture Display}

After I am focused on taking more photos, the next step is to get them on my computer.

I’m really good about doing this with my dSLR, but horrible about doing it with my phone.  Some pictures sit on my phone for months before I ever put them on my computer.  And a lot of the pictures I take these days are with my camera phone for convenience/logistical issues.  (I’m still busy just trying to keep track of the four little humans I usually have around me and all the “stuff” that seems to accompany them).  And without that handy camera phone, I’d miss pictures like this.  Of my kid hugging a mannequin.  Not weird at all.

Here’s the key to the rest of The Picture Display Movement.  There HAS to be a system and it has to be SIMPLE or it will never get done.  So find a system.  Schedule a consistent time to do it.  And keep it simple!!  We schedule time to clean.  Time to do laundry.  Time to exercise.  We should DEFINITELY schedule time to organize, print, and display our photos.

Here’s the system that works for me.  This will have to be tweaked for each family just like chore charts have to be tweaked for each family (still working on fine tuning our chore/money system), but find something, anything, that works for you and stick to it.

I load my photos directly into iPhoto.  When I plug in my camera or phone to my computer, iPhoto automatically pops up and the pictures go straight in there.  The pictures automatically sort by date.

Once the pictures are loaded, I make sure they are backed up onto an external hard drive.  You can get those at Costco.  I just bought a 3TB external drive (most people won’t need one that big) for about $120.  Worth every penny if my computer hard drive crashes.  This is a step that should never be skipped.  It’s not hard and only takes a few extra minutes.  You can just drag and drop the photos onto the icon for the hard drive and it copies them to the hard drive.

2015-05-14_0001
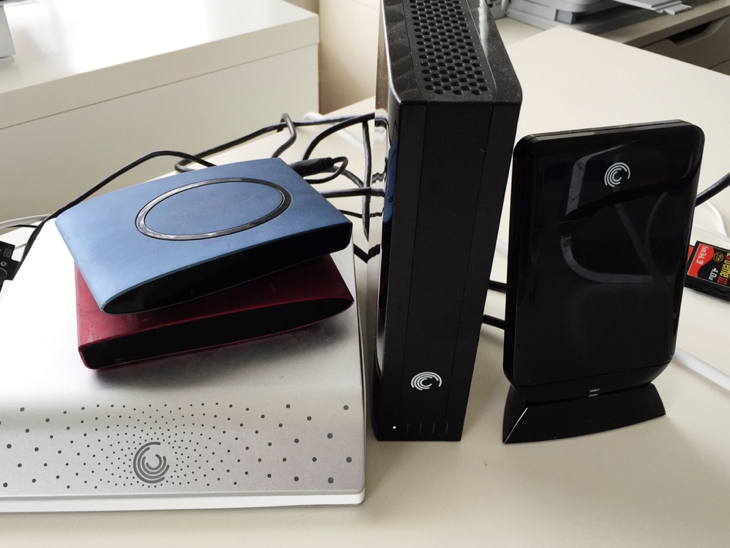
I also back up my entire computer hard-drive to an online site.  I researched several online storage companies and finally settled with Backblaze because it is unlimited storage for a really affordable price ($5 per month) and it allows me to back up all my external hard-drives as well (as long as I plug them in every 30 days).  I have 7 full external hard drives and a nearly full computer hard drive.  I see the “your startup disc is almost full” message more times than I care to keep track of.

Screen Shot 2015-05-14 at 5.23.43 PMI need a lot of storage space.  Backblaze backs up my entire hard drive (photos, documents, music, etc.) so if (more like when) my hard-drive crashes, I know everything is backed up on Backblaze.

When deciding on an online storage company, I wanted something that was:

1. affordable

2. I personally knew someone who used the company to recover photos

3. unlimited storage including external hard drives

So after looking at and comparing several well-known companies (and talking to several photographer friends), I decided on Backblaze.


If your photos aren’t backed up, I can not emphasize enough that you NEED to do this step.  Even if your photos are a big hot-mess right now.  Back them up.  Then worry about organizing.  Trust me on this one.


Step 2.  Load ’em and BACK THEM UP!!!

Click here for Step 3.  ORGANIZE those Photos.

(Join thousands of others and Subscribe to the blog–in the right margin–if you want more great stuff!)


Picture Display Movement. Step 1. Take pictures!!

I was talking to a friend the other day and she said she had misplaced her SD card with an entire years worth of photos on it.  I skipped right over the part about her saying she lost the card and couldn’t wrap my head around the fact she had an entire years worth of photos on one card.  I can fill up a 4GB card in about 20 minutes taking pictures of my kids.

And after seeing how often my sister and a few other relatives who will remain nameless take pictures, and by often I mean never, I realized maybe this is an issue for a lot of people.

So I decided Step 1 for most people would have to be TAKE MORE PICTURES!!! This applies to me as well.  And probably a lot of other professional photographers I know.  Because we’re so busy taking other people’s pictures, we sometimes forget (or choose not to) pick up the camera and take pictures of our own people.

The actual process of taking a picture costs me nothing.  Monetarily speaking.  So why not take more?

Even if they aren’t always (or ever) “great quality” photos.  The few pictures I have of my childhood won’t ever make it into a magazine, but I’m so grateful I have them 🙂

And the benefits of photographs in our lives is so great, I should be taking as many as I can!

When I pick up my camera and take a picture of something, intentionally or unintentionally I send a message.  A message that whatever I am taking a picture of is important to me.  Because taking a picture of something signifies I want to remember it, whatever “it” is.  A person, a moment, a feeling.

So without saying anything, when I stop what I’m doing and take a picture of something, I show that moment/person/thing/feeling/event was worth stopping for, was worth my time, and was worth documenting.

Photographs tell the story of who I love.  What relationships I cherish.  Moments that make me laugh.  And moments that make me want to cry.  What daily life events I find value in.

If I don’t have those photographs, what story do I have to tell?  And what message do I unintentionally send when I choose not to photograph anything (or many things?)

I’m not saying I need to spend my life and every waking moment taking pictures.  But I definitely think I should be intentional about the photographs I DO take and to make it a priority to document our stories.

So.  Step 1.  Take a lot of pictures.  🙂

Click here for Step 2.

Uniquely awesome photo display.

The walls in my home are sacred space.  Whatever goes on them is something we’ll see every.single.day.  So I’m pretty choosey about what gets a spot on those walls.

Which is why many of the walls in our home are still bare.  Just waiting for the perfect thing to hang on them.

The wall in my office is one such space.  I spend a fair amount of late night hours on my computer.  And I wanted something inspirationally awesome to go on the wall I see the most while in there.

I’ve held out.  And I finally found the perfect thing.

It went from this:

To this:

It took a little longer than anticipated to get on the wall.  And I didn’t finish during naptime (which created some challenges with a two-year-old who will remain nameless that was eventually banished from the room) or before my girls got home from school so they sat on the floor and watched me finish.

While I carefully selected photos out of my rather large pile, the girls commented on the photos.  The things they said were unsolicited.  I asked for no commentary on what was going on (because usually by that time of day, I’d like to give my ears a time-out).  I was in full concentration mode to hurry and get those things on the wall before the previously mentioned two-year-old sabotaged the entire project.

Mya:  “Whooooa.  I can’t believe you put so many photos of just me.  All by myself.  I must be special.”

Jaida:  “Mom, I’m really glad you can take such good photos of us”

And my favorite (and most gratifying since I have an intentional purpose for taking SO many photos of our everyday lives):

Mya:  “Wow, Mom, you sure do take a lot of photos”
Me:  “Why do you think that is, Mya”
Jaida: (without a pause) “Because you think we’re awesome!”

Intentional parenting for the WIN!

I got the photoclips at fotojojo.com

I went back about 4 years and looked through all our pictures, picking out some of my favorites.  I printed them at Costco (I know, gasp–but when I’m only printing as a 4×6 and I’m printing THAT many, I just use Costco).

I started with a block of photos put together first.  I taped those to the wall, and then added pictures one-by-one directly onto the wall.

There probably was an easier way to do it, but this worked for me.  Eventually.

It took a few hours.  But it’s my favorite spot in the house right now.  The kids too.  We’ve all spent a lot of time gazing at that wall, reminiscing about a lot of really good family memories in our home!

I ended up with 153 photos on the wall.  At some point I may go down the wall further, but for now, I have to keep the pictures out of reach of certain little fingers who like to destroy things.

And the view from my desk now.  I dig it.

Of course it looks cooler if the photos are good quality.  So if you want to do this in your home, learn how to improve your photo skills.  Not just the quality of the photo, but also the type of pictures you take.  You won’t regret it.  One of the best investments you’ll ever make.

Related Posts Plugin for WordPress, Blogger...