
A friend of mine was going to share some photos with me she had taken on her camera. She started to e-mail them to me in batches until I stopped her. Sweet mercy. Please don’t send me 10 e-mails (or text messages) with 5 photos in each e-mail (or text). That was the only way she knew how to send me the photos and I have come to realize there are many people who don’t know an easier way to share photos.
So today I’m going to show you two really easy ways to share photos with your friends and family from your iPhone. E-mailing photos is certainly still an option, but when you want to share a bunch of photos, there are easier, more efficient ways to do it. And easy and efficient are my jam. Here are two easy ways to share photos with your iPhone (not emailing or texting them batch by batch).
Share option Number One: Create a Shared Album. Here’s how you do that:
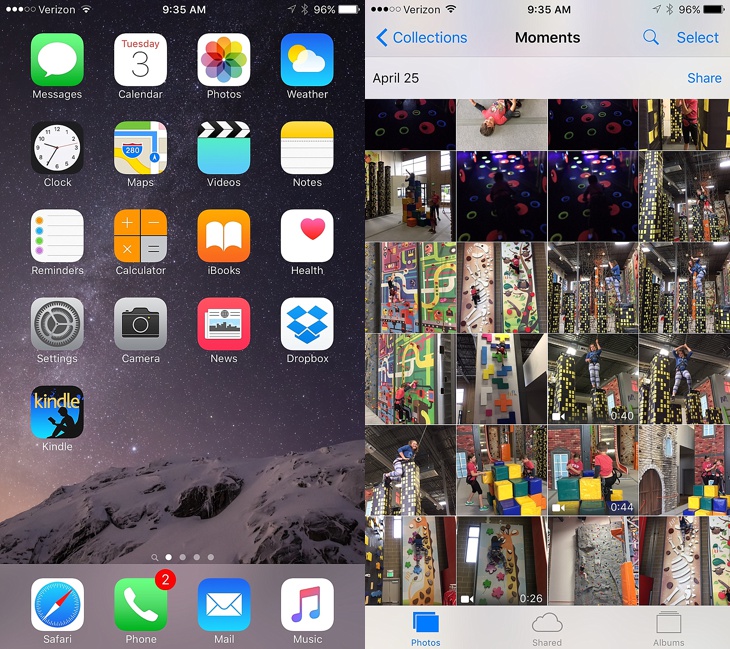
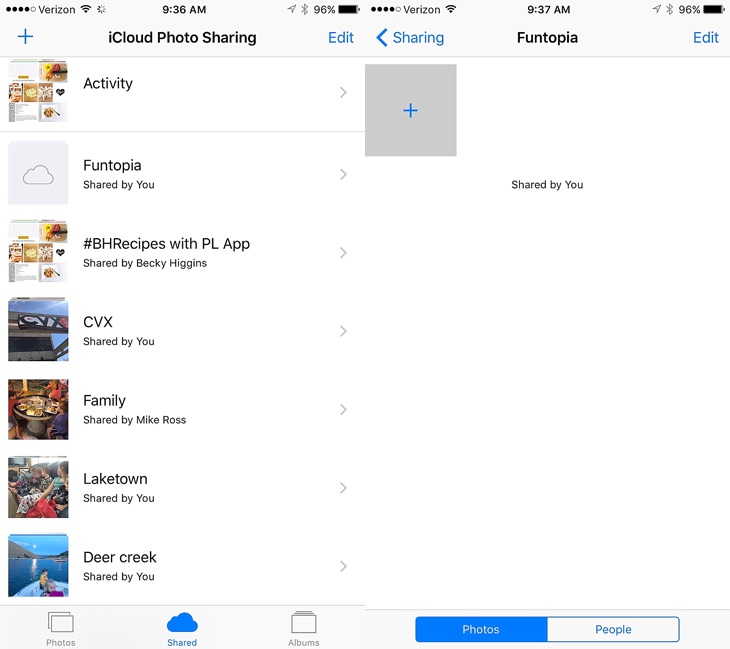
Click on the “Photos” icon on your iPhone. This will bring up all of the photos on your camera roll. At the bottom of the screen below all your photos, click on the cloud with “shared” underneath it.
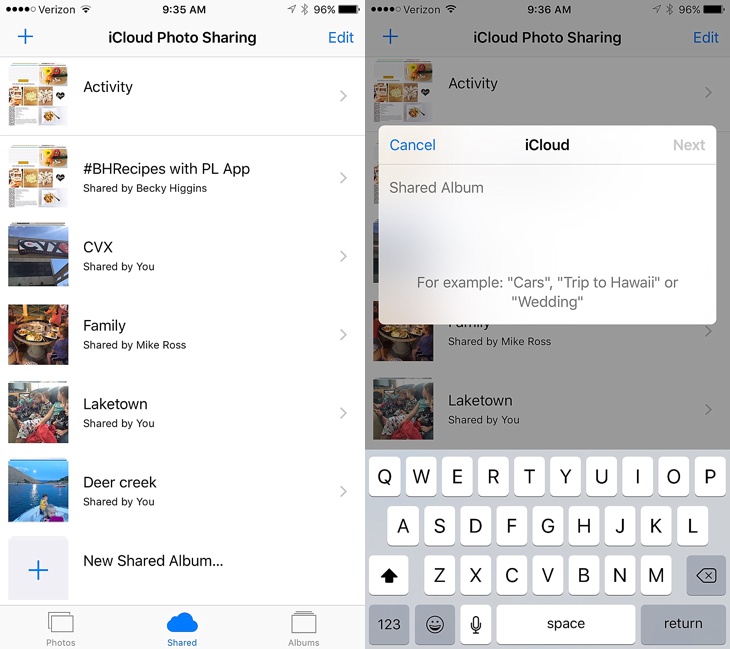
This will bring up all of your “shared” folders. You may not have any folders in there are this point, but if you do, you’ll see them all listed here. Click on the “+” icon either in the top left of the screen OR click on the “+” by “New Shared Album” to create a new album to share with someone (or multiple people). This will bring up a screen where you can name the album.
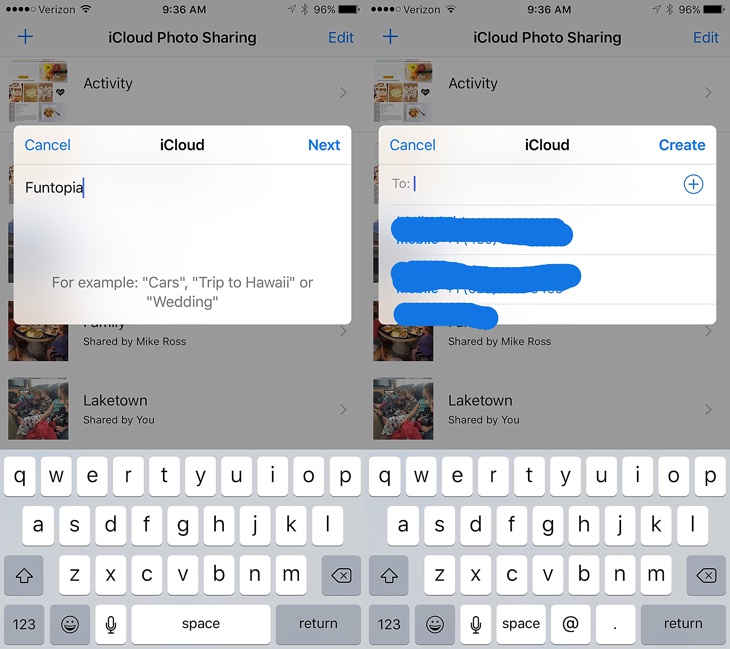
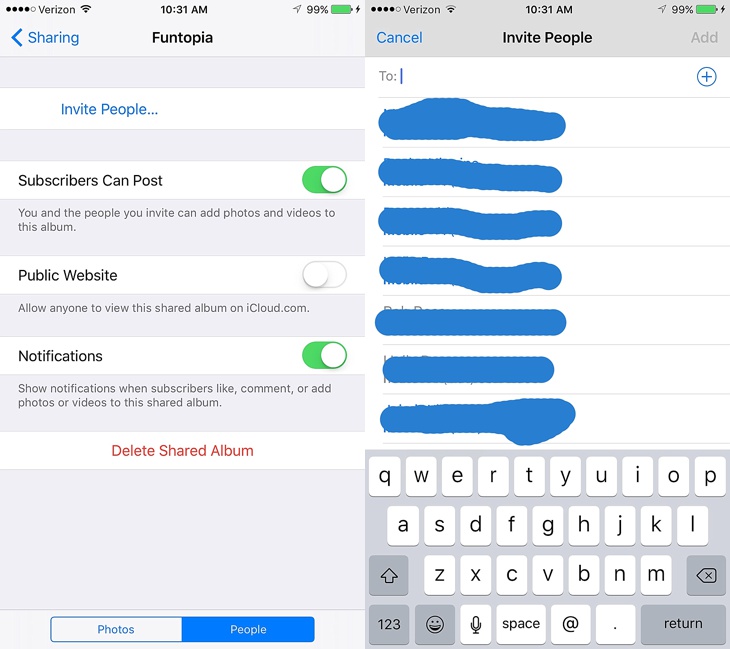
Give the album whatever name you want and click “Next”. This will give you the chance to add the numbers of the people you want to share the album with. It will pull up numbers of people you’ve recently shared with (I crossed them out so people don’t randomly start pranking my friends), or you can click the “+” in the circle to the right to add more people from your contact list. Or just type in the number if they aren’t in your contacts or if you actually know their number (my friends and I were laughing about how many numbers we don’t know these days–they’re all saved in our phones but not memorized. But we can still call our childhood friends parents house if we needed to).
You can add people now, or do it later. Once you have the numbers in for the people you want (or don’t add any numbers at this point if you want to add them later), click “Create”.
You’ve now created a new album. Mine is titled “Funtopia”, a climbing place I recently took my kids to. And yes, it was fun. Once you have your album created, click on it and it will bring up a screen where you can start adding photos to share. To do this, click on the “+” on the screen.
When you click on the “+” it will bring up your camera roll. Click on “select” in the upper right corner and scroll through your photos and tap on all the ones you want to include in the album. You can also include video.
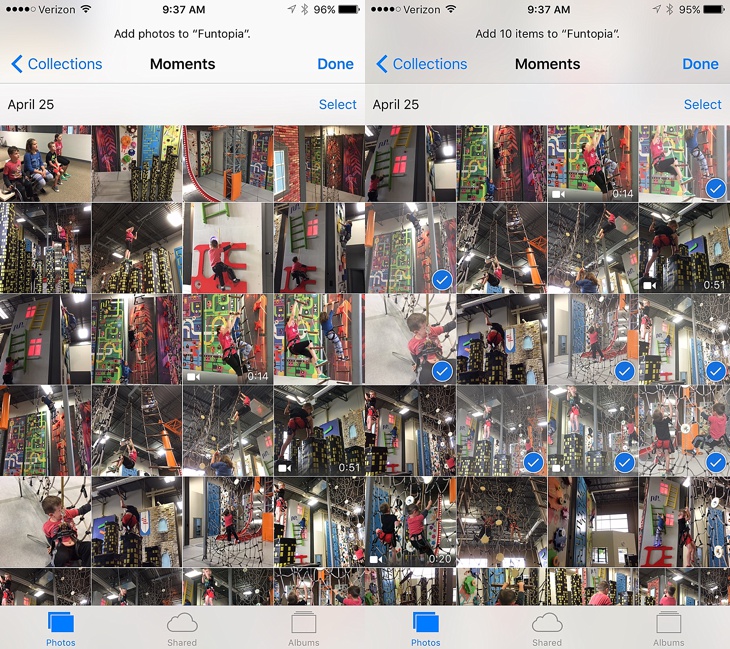
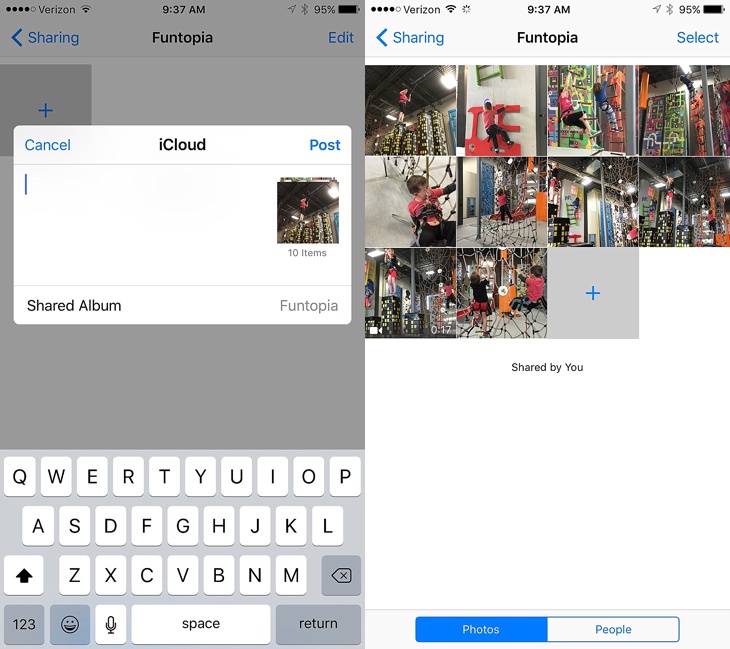
Once you’ve selected all the photos you want, click “Done”. It will bring up a white screen where you can add a comment/text if you want, or just click “Post”. All the photos will then appear in the shared folder. You can add more photos at any time by clicking the “+” icon in the grey square.
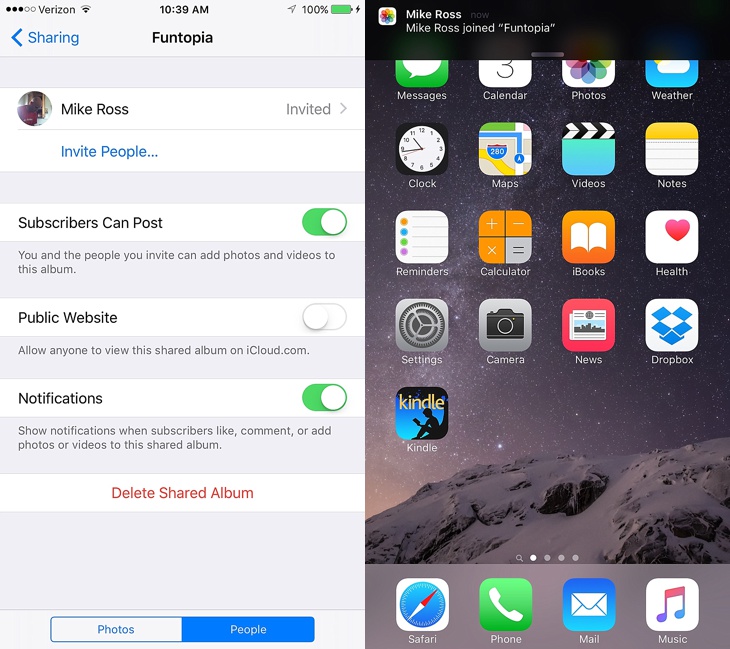
Now that you have the photos in the shared album, you can invite people to share the photos with (if you haven’t already done so). Click on the “People” in the bottom right. This will show you who you’ve already invited and allow you to invite more people. You can allow the people you invite to share photos as well (keep the slider on that says “Subscribers can post”). They can then add photos to the same album by clicking the “+”. This is a great way to gather everyone’s photos at an event or on a vacation. Before everyone leaves, quickly set up a shared album and get everyone’s photos. Then download those photos to your own camera roll to save them. Or set up the shared album at the beginning and people can add the photos as the event/vacation goes along.
When you invite someone to the group, it will show they’ve been invited. They will get a notification allowing them to accept or decline the invitation. When they accept, you’ll get a notification letting you know and the “invited” next to their name will go away. You can invite more people at any time as well as add more photos from anyone who is in the group (as long as you chose to let subscribers add photos).
Once a photo has been added and people have been invited to share, you can leave comments on photos by choosing one photo, then clicking “add a comment” at the bottom of photo. Then just type your comment and hit “Send”. You can also “like” photos by clicking “like” in the bottom right of the photo. These comments and likes are only seem by those who belong to the shared album. It’s sort of a mini social media sharing experience but only with the people invited to the album.
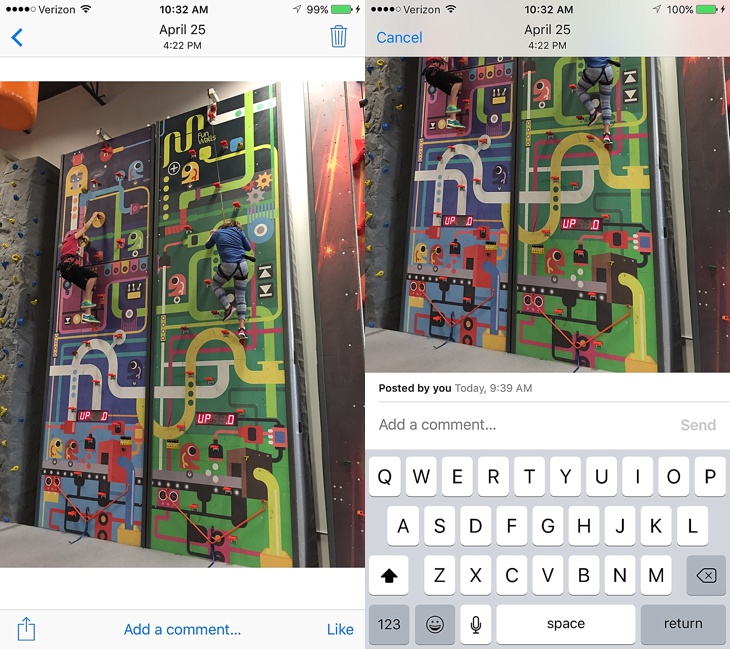
If multiple people are adding photos to a shared album, be sure to save the photos to your camera roll by clicking on the square with an upward arrow on it in the bottom left corner of each photo you want saved. If the shared album is ever removed, you no longer have access to the photos in it unless you’ve saved them to your own camera roll.
That’s it. You can now share large volumes of photos/videos easily with your friends and family.
On to the second way to quickly share photos.
Share Option Number 2. “AirDrop” your photos to someone close by (the catch here is that you have to be in the same vicinity to share). Here’s how you do that:
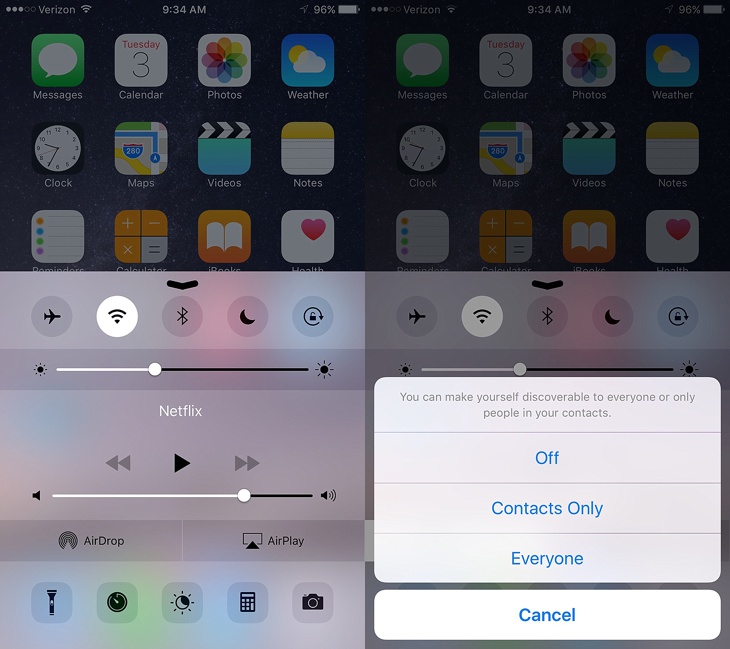
Put your finger at the bottom of your screen and slide up to bring up the menu shown below. In the bottom left choose “AirDrop”. Another menu will pop up where you can choose to keep AirDrop “off”, choose “contacts only” (only people in your contacts), or choose “everyone” (anyone who has airdrop on who is close by you regardless of whether they’re in your contacts or not). Choose “contacts only” or “everyone”.
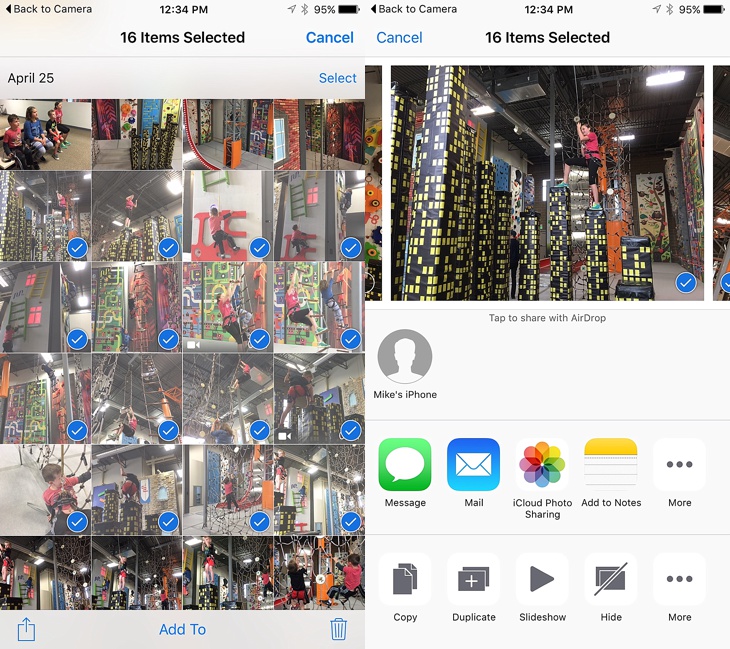
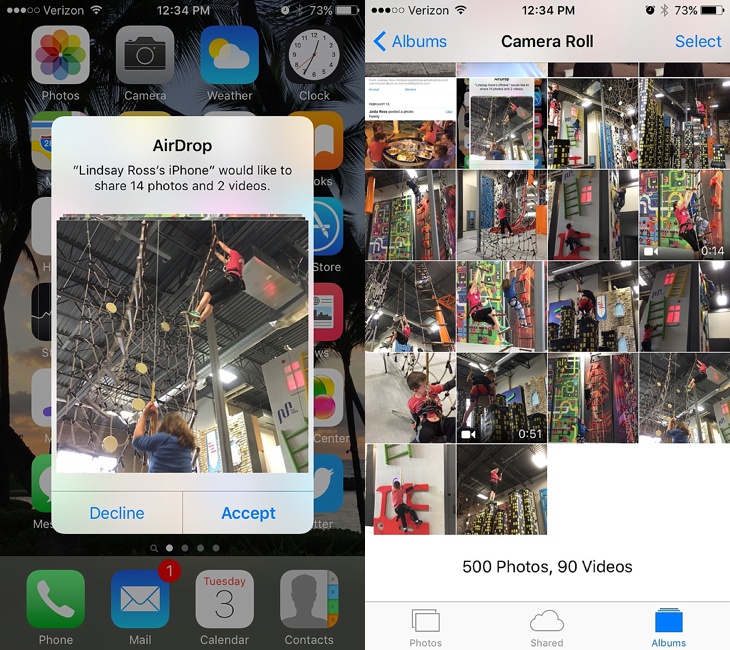
Whoever you are airdropping photos to also has to have their AirDrop turned on (by following the above step). Once you both have air drop turned on, go in to your camera roll, choose “all photos”, then click “select” and choose the photos you want to send by tapping on each one. Once selected, click on the square with the upward arrow in the bottom left corner. This will pull up a screen where you choose what to do with the photos. Anyone who is relatively close to you who also has AirDrop turned on will pop up in your screen (see “Mike’s iPhone” icon below). Click on whoever’s name you want to send the photos to.
The person (or people) you chose will get a notification letting them know someone is trying to AirDrop photos to them. They can choose to accept or decline. When they choose accept, the photos then go straight into their camera roll and your done.
Two easy ways to share photos!
If you’re looking to improve the photos you take with your phone, be sure to check out these Ten photo tips that will immediately improve the photos you take with your phone.
And if you want to take better every day photos that document your days better, be sure to check out the Every Day Photos guide: ideas, tips and tricks to take better every day photos to tell the stories of our lives.
Happy photo sharing.
I use both of those methods on an almost daily basis … Life changing, I tell you 🙂
Of course you do Kari. 🙂 You’re a photo wizard like that.
Thank you!!! I just texted batches of photos & videos 2 days ago!! ??
We’ve all done it Krista! But now you know a better way. Wahoo for everyone!!