I’ve never stayed current taking photos and getting them printed from year to year. Truth is, I’ve never tried. Last year I really started to focus on being more intentional about the type of photos I take and getting them printed and into albums so we can actually SEE the photos and relive the emotions of the memories.
I think about this quote all the time: “When you have a printed picture, it forces you to slow down and have an emotional experience with that memory.” (Check out this video of the “dreadlock dad” who scrapbooks–love it)
This is the first year I’m planning to stay current month-t0-month and come December 31st, I’ll have a fully completed album for the year. So far, so good. I’m current right now and can already say how much I love this approach. I thought I’d share some of my tips with you to help YOU make an effort to take the right kind of photos, print them, and stay current with your photo album this year (we’ll talk about past years a little later in this post).
Here’s the approach:
**I’m using the Project Life App to make my album pages. If you’ve been around here for a while, you already know my love for the App. If you’ve never heard of the App, check out this post and this post to see how easy it is to use. This will be my ticket to staying current this year. It’s SO easy to use and I can do it ANYwhere, ANYtime. No stuff. No fluff.
**I’m documenting week-to-week and doing one spread (so two pages) per week. If we do something special, there’s a holiday/birthday, or we go on vacation (please please let there be lots of that this year), there will be more than one spread for that week. This is totally flexible, but generally speaking, one spread per week is adequate to cover what happened without being overwhelming and including more than needs to be included (aka, people eventually want to gauge their eyes out looking at it if there’s too much).
Here are the spreads I’ve done since the year started:

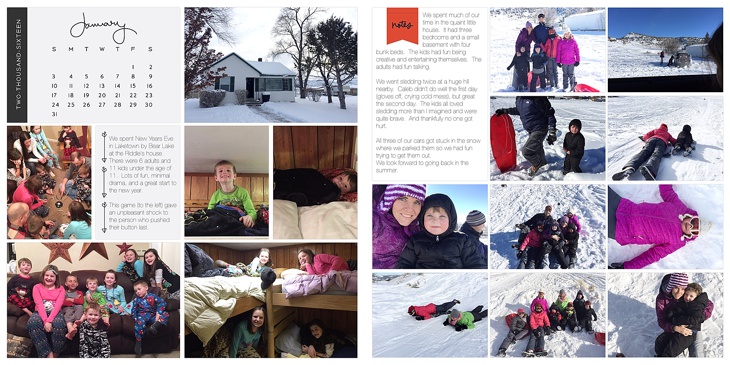
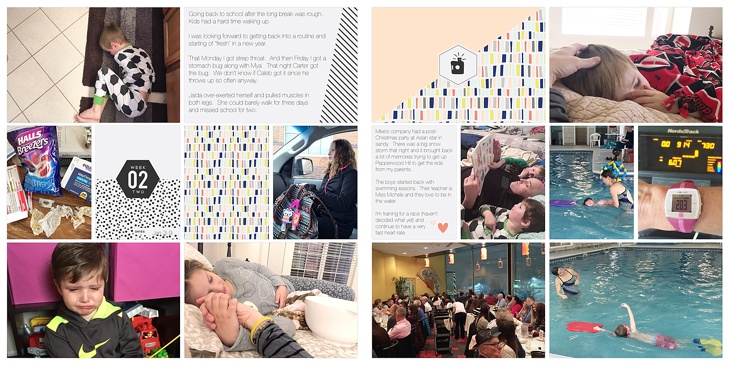
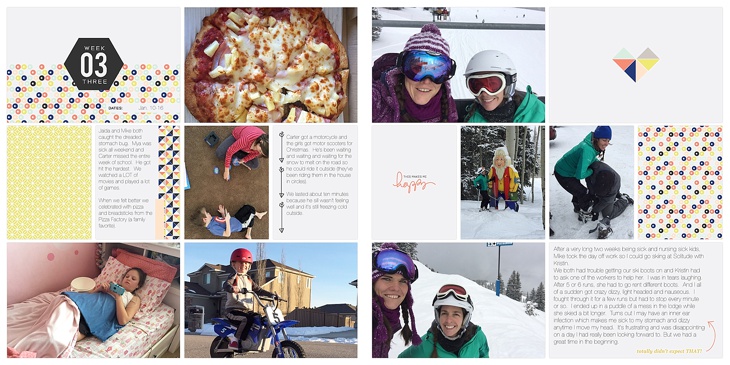
I probably won’t include a “Week 1, week 2, week 3…” card in each spread but in some of them I will. (Those cards are from the 2016 Project 52 kit in the Project Life App
**Each Sunday night, I sort through the photos I’ve taken that week, pick the ones I want to put in the spread, and create the spreads on the Project Life App. This process takes a total of about 20 minutes. 20 minutes per week and by the end of the year, I’ll have a completed album. The key is setting aside the time each week to just DO IT. Pick a day and hold yourself to doing it that day. If you have a hard time getting motivated to DO things you know you really want done, read this post. It helps me SO much to stay motivated to get things done (ANY things).
**The HUGE advantage to doing a spread each week is the journaling. It’s obviously easier to remember what went on that week if you journal about it that week. As I’m playing catch-up on previous years, journaling is much harder because my memory is terrible and I usually can’t remember many details or specifics about what we did or what went on. I’m grateful I at least have a ton of photos to help us remember, but journaling definitely helps document some of the things the camera can’t capture. And if you checked out those posts I mentioned earlier about the app, you can use Siri to do your journaling which saves a TON of time rather than trying to type on itty bitty keys with your thumbs.
This year I’m also attempting a Project 365 where I take at least one photo each day for the entire year. This seemed really daunting to me last year, but I decided to give it a go this year and it honestly has been super easy so far. I generally take at least one photo a day anyway without thinking about it.
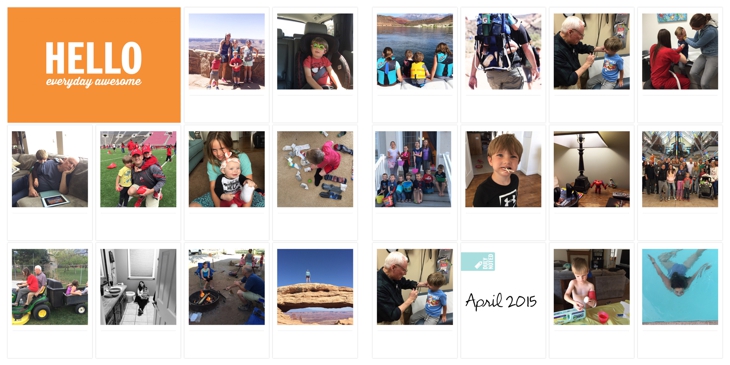
**I’m using the Collect Photo App to keep track of my photo a day (I just pick one out of however many I took that day). I add a little text at the bottom of the photo for some journaling and save them in the Calendar. It looks like this:
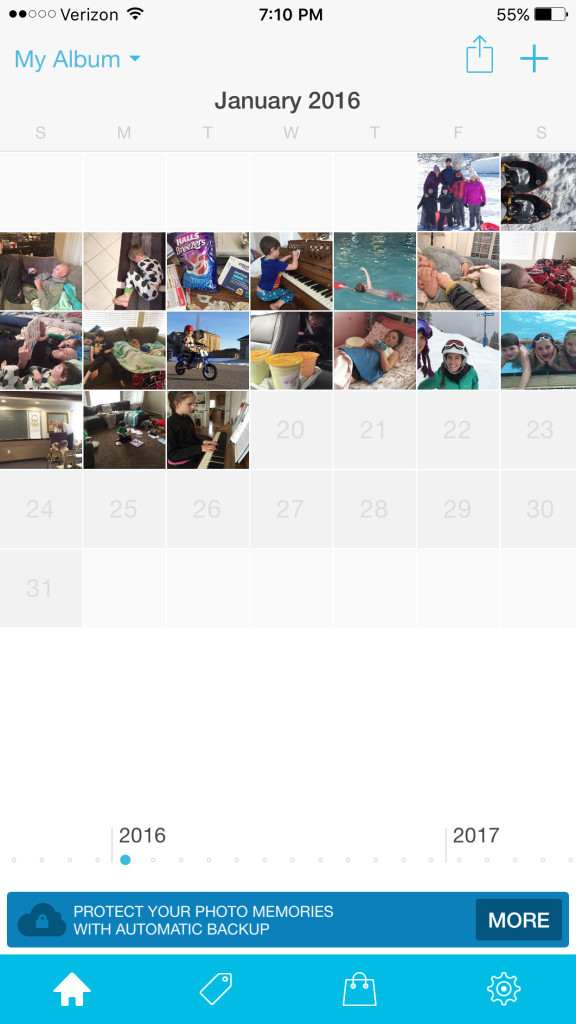
At the end of the year, I’ll put these photos into a Project Life App spread, print them, and slip them into the front of the Album for the year. This is a sample of what that will look like when I get those into the spreads. Only each photo will have some journaling below it…I think it will be cool to see the entire year at a glance with a photo a day.
**Although I use my phone camera (I have an iPhone 6 plus–someone will ask) for a lot of my daily photo documenting, I also use my dSLR (I have a Canon 5d Mark II–someone will ask) as much as I can as well because the photos are better. Each Sunday, I load whatever photos I’ve taken with my dSLR onto my computer, pick whichever ones I want to include in that weeks spread, put those photos into Dropbox, and then I can access those photos straight through the App (you can see how to access them on the video in the post mentioned earlier). So not ALL the photos in these spreads are coming from a camera phone. Some will be coming from the dSLR as well.
**I delete as I go. Meaning–if I take a bad photo, I delete it right then. Or, on Sundays when I sift through the photos, I delete any I don’t need as well. I’m pretty liberal on my deleting. I don’t need 10 photos of the same-ish thing. This frees up space on my phone and computer and helps with the overwhelm of sifting through waaaaaay too many photos.
**This year I’m really focusing on documenting what our every day lives look like. What we do from day-to-day. What our daily family life is like. What the kids do each day…. I’m pretty passionate about this kind of documenting and you can read ALL about that and learn a ton more with the Every Day Photos Guide here.
**I do my best to take the best photos I can. These ten photo tips for your phone will make a HUGE difference in improving the photos you take with your phone. Some of those tips will also improve the photos you take with a dSLR as well. They’re worth reading.
**Despite my best efforts, some photos still need a little editing (usually because there’s not enough light and the photos need to be brightened). My favorite app for editing photos in the phone is PicTapGo. You can read about some of my favorite Photo Apps for your phone here. I honestly do as little photo editing as possible. I don’t enjoy it so I don’t like to spend much time there. And truth be told, filters usually make photos look worse (in my opinion). But often photos could use a little “lightening up”. You can also edit your photos straight in the Project Life app which I love. This is often all they need. Just brighten a little, and add a little contrast and it can make a big difference to how they look when they’re printed.
**I use just ONE Project Life kit per year. This makes the process much simpler. I also stick with Design A for many of my layouts. I use other layouts if I have a lot of photos I want to add on one particular page. But I try to really simplify how many layout templates I use. Less choices is better for me.
**I’ll be printing these pages as 12×12. I tried the 8×8 but they’re just too small for my taste. This is totally personal preference. I use the 8×8 for recipe pages from the App (super love this way to save all my recipes), but for the family photo books, I’m sticking with 12×12 for now. You can print straight through the App, OR, buy print credits from Persnickety Prints when they do a sale twice a year! The print quality is excellent either way and the price is exceptional (you can’t even get 12×12’s from Costco for this cheap–and they are professional quality prints)
I also found this post from Becky Higgins incredibly helpful with tons of tips for staying current with family photo albums (and tips for catching up with past ones). She’s been a scrapbooker since she came out of the womb and she knows what she’s talking about. It’s a long post, but it’s full of a ton of really practical tips to help simplify this whole process.
A quick bit about past years and trying to “catch up”. I’m using both the physical Project Life system AND the app to catch up with past years. If I already have photos printed, I’m using the physical system. If I don’t have photos printed (they’re all digital on the computer), I’m sorting through those photos on my computer, being very selective about the ones I want to use (600ish per year–some years I have close to 15,000 photos in a year so I really have to narrow these down), putting them in Dropbox, and using the App to catch up on past years. I’m partial to the app because I can do it anywhere and I don’t have to get any “stuff” out. So instead of getting on Facebook or other things I may otherwise do while killing time here and there, I’ll get on the app and do a few spreads for past years. The key to this is organizing the photos into monthly folders in Dropbox. Otherwise it’s hard to remember which photos you’ve used and which ones you haven’t.
**My advice for people just starting–pick something you LOVE and start with an album for that. When I first started, I did an album just of Lake Powell trips we’ve taken. I love Lake Powell. So it was fun to print those photos off and create an album (this was before the app was around). Then decide what you want to do next…Year-t0-year, different vacations, holidays….totally up to you.
I also recommend starting where you are. So instead of fretting about how far behind you are, just START NOW and do this year. And as you get the hang of it, and learn what works and doesn’t work for you, you can slowly start printing photos (or putting them in the app) from past years and working on getting those in albums. Or, you can get your kids to help you. This is by far one of my favorite gifts to give my kids and it takes some of the pressure off me to get photo books printed for each of them.
**YOU CAN DO THIS. If I can do it, YOU can do it. I promise. You just have to have a strong enough “WHY”. Why are you doing it?? Really, stop and come up with an answer for this. Take time to figure out your why (good advice for ANYthing you do in life). If your answer really truly matters to you, you’ll find a way to get this done. You just have to PLAN time to do it, and stay consistent. It’s hard-ish. It takes work. I won’t lie about that. But anything worth doing is hard. And it’s also worth it.
**Last tip (that I got from Becky who got it from the great Stephen Covey): BEGIN WITH THE END IN MIND. What do you want the end product to look like? Why are you doing it? Who is it for? What stories do you want to tell? What do you want your kids to know about your family life? What do you want your ancestors to know? What’s important to you day-to-day? Think about the END product and work your way back to the start. And then, START. This really helped me get a better vision of how I wanted to document our family through photos.
That’s probably enough info for one day. The thing I’d emphasize the most with all of this–just START. Start somewhere. Anywhere. Be more intentional about the type of photos you take and make an effort to get them off your phone/camera and into your home where your family can enjoy them. It’s SO worth it.
Questions? Comment below or as always, feel free to e-mail me at [email protected]!!
This post is amazing!! Full of great tips! Thx so much?! I plan to bookmark it and refer back to it!!
Thanks for reading it Susan. Glad it was helpful! It’s definitely a lot of work to try and stay current, but some of these tips make it a little easier.